This is the second project in the beginner category in the #beginner2advanced challenge.
The link to all the apps in this challenge can be found here.
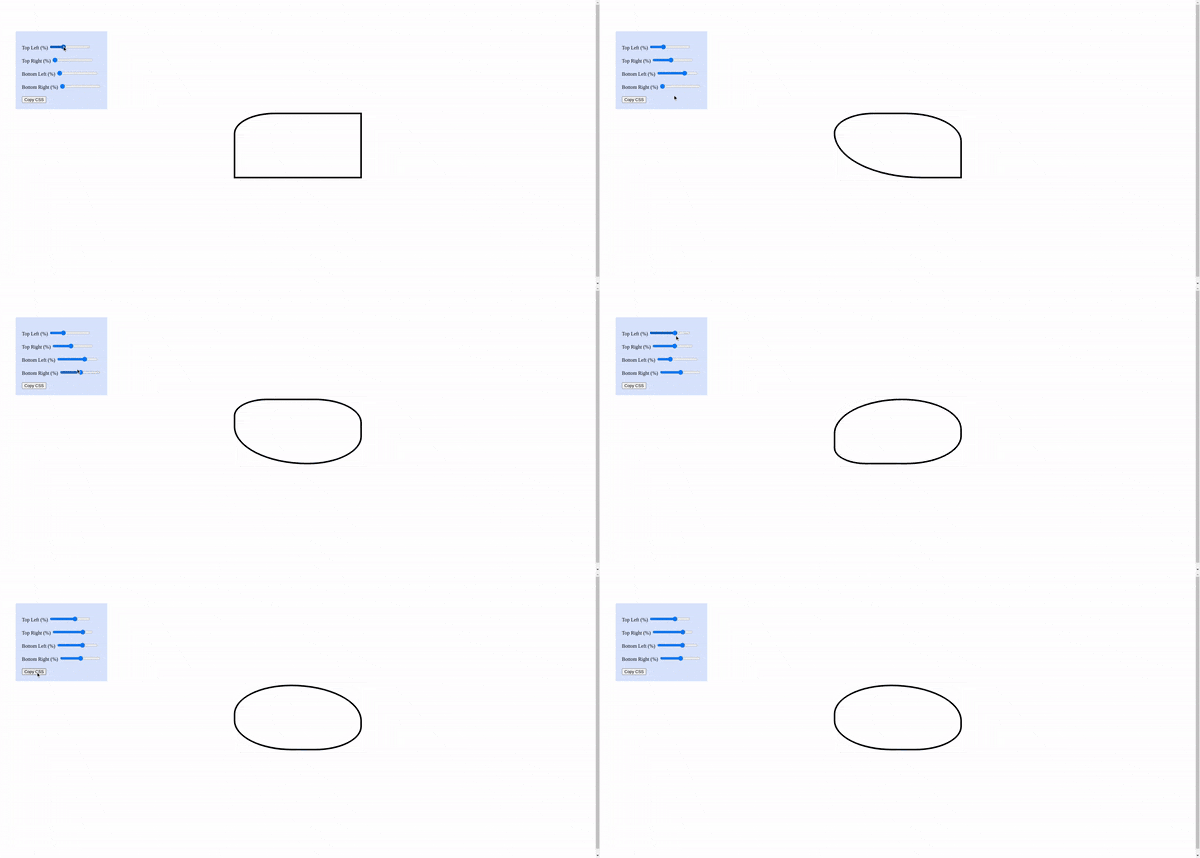
In this article, we will be creating a web application that allows us to manually select the property of a border-radius and copy the CSS code generated by the border-radius controllers.
NOTE: This project is created using HTML, CSS and Typescript.
The end result of the application will look like this:

Creating the HTML and CSS file
First, we create an index.html and a style.css file as below.
The index.html contains a preview element and four <input type="range"> elements to select between a range of 0 to 100.g
<!-- index.tml -->
<!DOCTYPE html>
<html lang="en">
  <head>
    <meta charset="UTF-8" />
    <meta http-equiv="X-UA-Compatible" content="IE=edge" />
    <meta name="viewport" content="width=device-width, initial-scale=1.0" />
    <title>Border Radius Previewer</title>
    <link rel="stylesheet" href="style.css" />
  </head>
  <body>
    <div id="container">
      <div id="previewer"></div>
      <div id="controllers">
        <label>
          Top Left (%)
          <input
            value="0"
            type="range"
            min="0"
            max="100"
            name="border-top-left-radius"
            id="top-left"
          />
        </label>
        <label>
          Top Right (%)
          <input
            value="0"
            type="range"
            min="0"
            max="100"
            name="border-top-right-radius"
            id="top-right"
          />
        </label>
        <label>
          Bottom Left (%)
          <input
            value="0"
            type="range"
            min="0"
            max="100"
            name="border-bottom-left-radius"
            id="bottom-left"
          />
        </label>
        <label>
          Bottom Right (%)
          <input
            value="0"
            type="range"
            min="0"
            max="100"
            name="border-bottom-right-radius"
            id="bottom-right"
          />
        </label>
        <button id="copy-btn">Copy CSS</button>
      </div>
    </div>
    <script src="./main.js"></script>
  </body>
</html>
Then we will include this simple stylesheet to style our application.
/* style.css */
body {
  display: flex;
  justify-content: center;
  align-items: center;
  height: 100vh;
}

#previewer {
  border: 5px solid black;
  height: 200px;
  width: 400px;
}

#controllers label,
#controllers button {
  display: block;
  margin-top: 20px;
}

#controllers {
  position: absolute;
  top: 100px;
  left: 50px;
  background: #0059ff29;
  padding: 20px;
}
The Typescript Code
const previewer = document.getElementById("previewer") as HTMLDivElement;
const controllers = document.querySelectorAll("input");
const copyCSSButton = document.querySelector("#copy-btn") as HTMLButtonElement;

const convertToCamelCase = (str: string): string => {
  let strArr = str
    .split("-")
    .map((arr) => arr[0].toUpperCase() + arr.slice(1))
    .join("");
  return strArr[0].toLowerCase() + strArr.slice(1);
};

controllers.forEach((controller) => {
  controller.addEventListener("change", (e) => {
    const camelCaseStyle = convertToCamelCase(
      (e.target as HTMLInputElement).name
    );

    previewer.style[camelCaseStyle as "borderRadius"] =
      `${(e.target as HTMLInputElement).value}` + "%";
    console.log(convertToCamelCase((e.target as HTMLInputElement).name));
  });
});

// copy generate css to clipboard
copyCSSButton.addEventListener("click", async (e) => {
  let copy: string = "";
  controllers.forEach((controller) => {
    copy += `${controller.name}: ${controller.value}%;\n`;
  });

  await navigator.clipboard.writeText(copy);
  alert("copied");
});
Conclusion
You can find how I did this in my repository.
If you enjoy reading this article, you can consider buying me a coffee.
